Service Agreement Maintenance Schedule
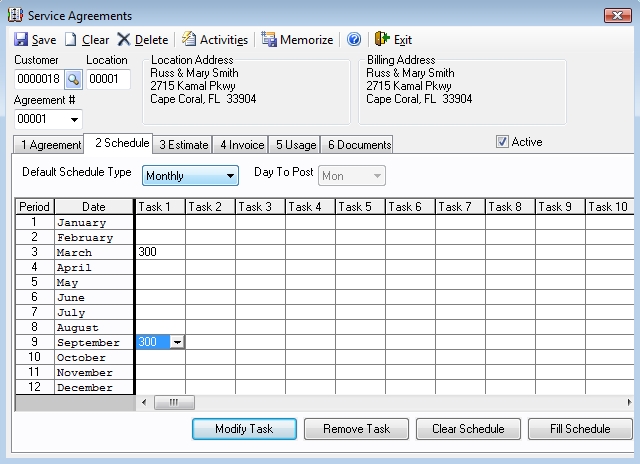
The Schedule Tab
Before the Maintenance Schedule can be set up (as described below), the basic information for the Service Agreement must be entered on the Service Agreement tab. Click here for information on setting up the Service Agreement.
Default Schedule Type
This area displays intervals during the year, such as weekly, monthly, quarterly, etc. and is used to set how many times per year that scheduled work will be performed for the customer. The chosen selection will adjust the Date column so that the correct number of entries can be made. The Default Schedule Type cannot be changed unless the Tasks area is blank. This can be accomplished quickly by clicking the Clear Schedule button.
Day To Post
This field is used to set to which day of the week the dispatches created by the Post Monthly Invoices screen are posted. Click the down-arrow button to the right of this field to see days of the week. Click on the desired day. This field can only be used if the Default Schedule Type is set to bi-weekly, weekly, or other. If any other frequency is used, this field is automatically set to Monday.
Date
This column shows a list of periods that can be used to schedule maintenance. The number of fields in the column and the dates they contain are set automatically by the choice made in the Default Schedule Type area.
Tasks
This area is used to schedule tasks to be performed. Click in the field next to the date the task should be performed, then enter or select the task to be performed. If multiple tasks need to be performed during the same period, add the new tasks in the columns to the right of this field to create separate dispatches for each task or click the Modify Task button to add any number of subtasks to a single dispatch. Repeat for each desired period.
Dispatches can automatically be created for tasks entered on this screen by using the Post Schedule to Dispatch screen.
Modify Task Button
Click this button to modify the selected task. Tasks can be modified to include specific notes, sub-tasks, parts and tools. Click here for more information.
Remove Task Button
Click this button to erase the highlighted task.
Clear Schedule
Click this button to remove all tasks that have been entered on this service agreement.
Fill Schedule
This button duplicates the first task in every column and assigns it at evenly spaced intervals based upon the Schedule Type setting. Example: Task 100 is entered in January with a Quarterly schedule. When this button is clicked, Task 100 will also be assigned to April, July, and October. Tasks can still be added or deleted manually after this action has been performed.
 How do I get to this screen?