This screen is used to enter and maintain tasks. Tasks associate a simple code with complex planned maintenance procedures, equipment, and the necessary tools required to complete the procedures. These codes can then be used to schedule planned maintenance from the Enter Service Agreements screen. Tasks are basically service request codes that have additional capabilities when associated with a service agreement.
Select the Add New button to create a new task or select any existing task and click Edit to modify it.
Task
This field is used to enter and display the actual tasking code.
Short Tasking Description
This field is used to enter and display the actual description that the tasking code represents. This description will be displayed in the Service Request Code field on dispatches created from the Post Schedule to Dispatch screen.
Task Time
Enter the estimated time for the completion of this task. The Tasking Code and Tasking Description will post to the Service Request Code field when a dispatch is created from this service agreement through Post Schedule to Dispatch. As with Service Request Codes on any dispatch, when the Electronic Dispatch Board is displayed, the total of the times of all Service Request Codes for all dispatches in any technician’s column are totaled at the top of the EDB immediately below the technician’s name. This allows the immediate viewing of the amount of work (in hours and minutes) that any technician has assigned to them.
Skill Level
Enter the skill rating of the task in this field. Be sure this number is equal to or greater than the skill rating of the most difficult sub-task.
Full Tasking Description
This field is used to enter information that will automatically be put into the Dispatch Notes field of the Dispatch Entry screen when a dispatch is created through Post Schedule to Dispatch. This full description will appear on the printed dispatch.
Sub-Tasks
This area is used to add, or delete service request codes associated with the currently selected task. Tasks can be associated as well but they will lose the additional features that service request codes don’t have.
Service Request Codes can be added to the task by entering the desired code in the first open field of the left-hand column and pressing the TAB key. If the exact code is not known, click on the magnifying glass icon to the right of this field. This will cause a search screen containing all tasks and service request codes to be displayed. Click on the up- or down-arrow buttons in the vertical scroll bar to see additional tasks and service request codes. Double-click the desired code to select it. Please note that the short tasking description, skill, and time fields of the service request code cannot be edited from this screen.
Existing service request codes can be deleted by clicking on them twice. This will put the program into edit mode. Press the DELETE or BACKSPACE key until the field is blank, then press ENTER twice.
Sub-Tasks will appear on the printed dispatch directly underneath their main task. Both the Short and Full Tasking Descriptions will appear on the printed dispatches. Also, when viewing a dispatch on the Dispatch Entry Screen, sub-tasks may be viewed by clicking on the View Sub-Tasks button above the Dispatch Notes field.
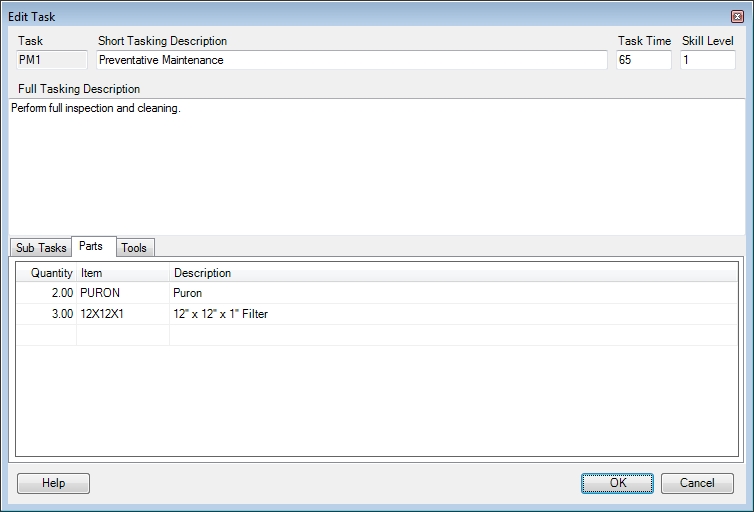
Parts
This area is used to attach inventory parts to the task. New parts can be added to the task by entering the desired part number in this field and pressing the TAB key. If the part number is unknown, click on the down arrow icon to the right of this field. This will cause a search screen containing all inventory items to be displayed.
Keep the parts used to complete tasks generic if possible. The necessary parts can be customized as needed on a location-by-location basis by using the Modify Task button on the Enter Service Agreements screen. See the Service Agreement Maintenance Schedule for more details on how this works.
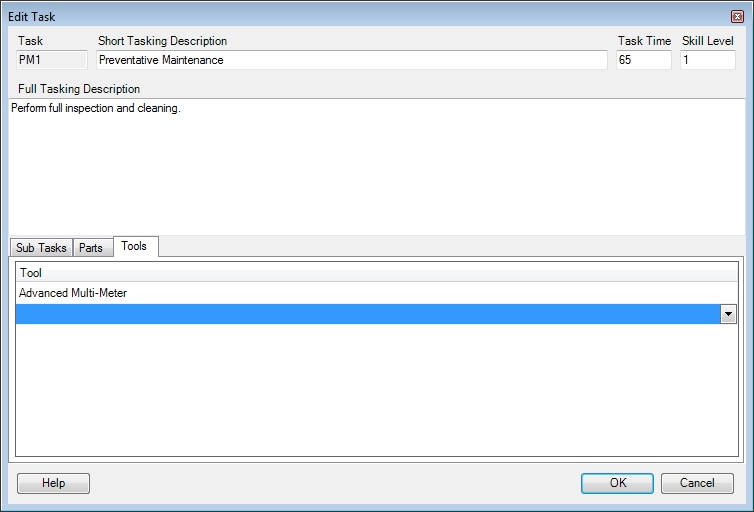
Tools
This area is used to display the tools needed to complete the procedures on the task. Tools can be added to the task by entering the tool name in this field and pressing the TAB key. If the tool name is unknown, click on the magnifying glass icon to the right of this field. This will display a search screen containing all tools. Click on the up- or down-arrow buttons in the vertical scroll bar to see additional tools. Double-click the desired tool to add it.
 Edit Task
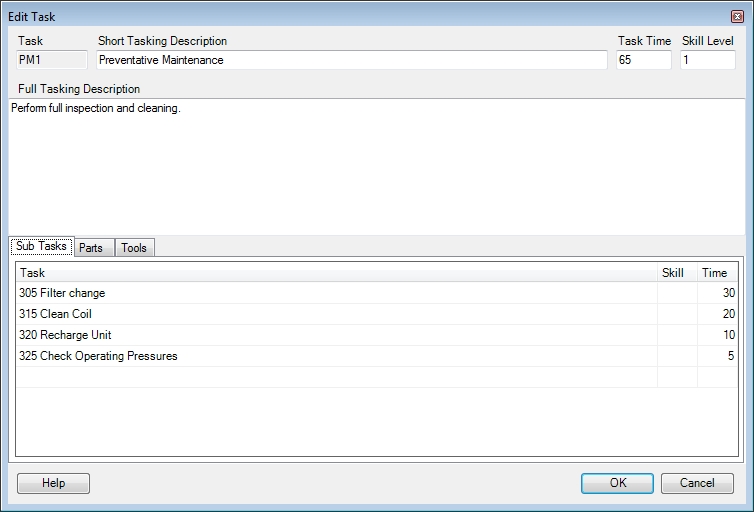
 How do I get to this screen?
 Related Topics