Adding/Removing data fields from a form
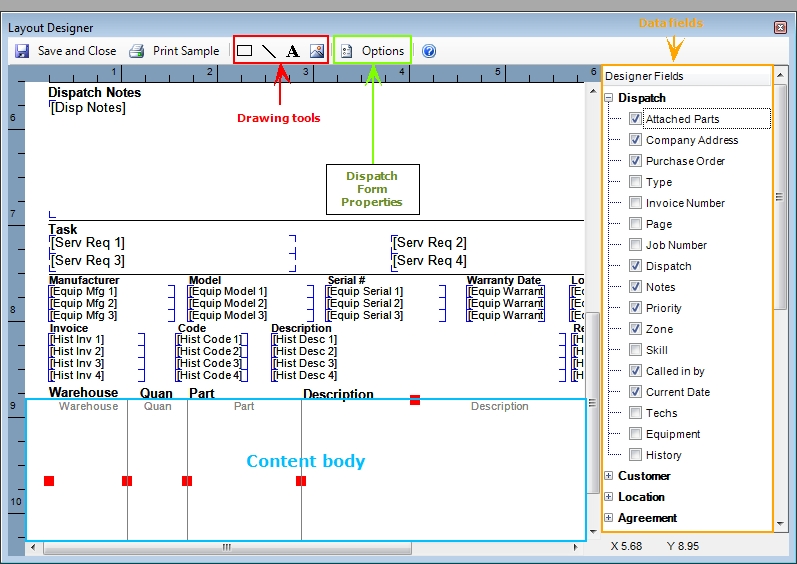
Data fields are automatically filled with the data you entered into ESC when the form is printed. You may choose which fields are printed on your form by clicking the corresponding check mark on/off (see illustration above for the Data Fields section of the screen). When a field is first added to the form it will be placed in the upper left-hand corner of the form. The data fields have been grouped into logical sections to make the data your are looking for easier to find.
Adding graphics to a form
There are four drawing tools for adding graphics to your form (see illustration above for the Drawing Tools section of the screen): frames, lines, labels, and images.
To add a new graphic to your form, click the corresponding Drawing Tool button. The new graphic is always added to the very top/left position of the Design Window. You may then move it or resize it any way you want.
Moving and setting the size of an item or a column on the form
Before you can change the size or position of an item on the form, you must select it by clicking on it.
Once you click on an item, a number of red dots appear on it. Move the mouse over a red dot, hold down the left button on the mouse, and drag the dot to the new position. The dot in the center of the item is used to move the entire item, the dot to the right of the item is used to make the item wider, and so forth.
If you click on any content body (see illustration above), a red dot will also appear for each column. You may use these dots to resize the width of each individual column.
Note: To reposition a body object, move the bottom handle to the desired location, then adjust the top handle. When resizing columns, do so from left to right so the fields stay on the screen.
Setting properties of an item on the form
To set the visual properties of any item on the form, right click on the item and select Properties. The following properties are available:
Note: When Can grow is selected, the selected field can expand so that it is almost touching the item below it. For this reason we recommend inserting a horizontal line beneath it. This will allow you to control the amount of space between the end of a Can grow field and the next line below it.
All fields set to Can grow must be below the Header Position!
Changing the visible columns in the content body
Each individual column in the content body (see illustration above) may be set to either be printed on the form or to be invisible.
To set the visible columns, right click anywhere in the content body and choose Set Visible Columns. A list of all available columns is displayed. If you wish a column to be visible, click to turn on the check mark to the left of the column.
Note: When you make a new column visible you may need to adjust the widths of the other columns to make the form print properly.
Changing the order of the columns in the content body
The columns in any content body may be set to print in any order you choose.
To change the order of the columns, right click anywhere in the content body and choose Order Columns. A list of all available columns is displayed. Click on the column that you wish to reorder and use the up/down buttons to move the column to the new position.
Special Dispatch Settings
When modifying a dispatch using the Layout Designer an Options button will appear in the toolbar. These options allow you to set the height of the form header, force all equipment to print (even if not attached), etc.
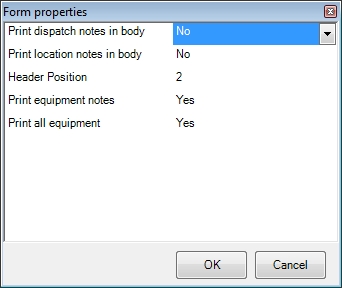
Note: This is still subject to the amount of room given to the equipment body. To ensure all the equipment prints be sure to set Print all Equipment to Yes AND set the Can Grow option in the equipment body.
Special Payroll Forms Settings
When modifying a payroll form, such as a W-2, using the Layout Designer, an Options button will appear in the toolbar. The only option available is the Form Split Location. Use this to divide the form in half. After doing this, duplicate the form in the bottom half of the screen. The top part of the form will contain the information for one employee while the lower half will show the information for the next employee.
 How do I get to this screen?