Getting Started with Assemblies
Simply put, an Assembly part is a part that is made up of other inventory parts. The Assembly part is "assembled" from a combination of other parts that you have entered into inventory. An Assembly part is never purchased in its assembled form; it is something that you buy the components of, and assemble yourself. An example of an assembly would be an installation kit, which consists of a switch, a certain length of wire, a drain pan, a certain length of copper tubing, and various other miscellaneous items. This assembly is billed to the customer through Sales Invoicing with its own selling price. For costing purposes, the costs of the individual parts and quantities are totaled together. When invoiced, the assembly will also deduct from inventory the quantities of the individual parts that make up the assembly.
Prior to entering assembly items into the Inventory module, see the Getting Started With Inventory topic for detailed instructions on preparing to use inventory.
To enter an assembly, first enter the inventory items that are contained in the assembly. These are entered as normal inventory items through the Inventory Entry screen. These items are entered with their normal costs and markup prices so that they may be sold and billed separately, if desired. For the Part Type field, select "Stock" if these are non-serialized items.
Next, an item needs to be created as the assembly item. This is entered as a normal inventory item, except that the Part Type will be "Assembly". The cost of the Assembly will correspond exactly to the cost of the individual inventory parts placed on the Assembly tab. When the Part Type is selected as "Assembly", the Assembly tab is enabled. Click on it to display an assembly form. This is where the inventory parts that make up the assembly are listed along with their quantities. Enter the Part Number or click on the down-arrow to perform an inventory part search. The part description will be displayed. Enter a quantity of this item that will be included in the assembly. Continue with additional items that are contained in the assembly. When all items have been listed for this assembly item, click on Save to save the assembly item and it’s assembly sub-items.
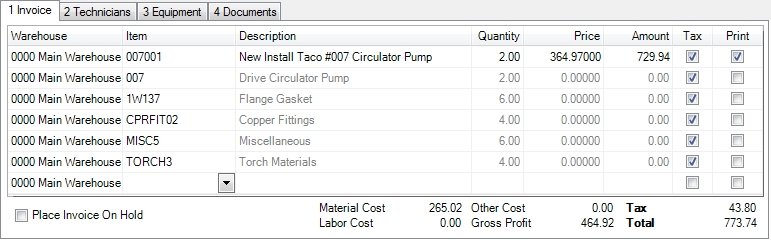
When the assembly is used on an invoice the assembly item and each sub-assembly will appear on the invoice. This allows you to swap out sub-assemblies or change quantities on the fly. Doing this could change the cost of the assembly but it will not change the price of the assembly unless you opt to do this manually.
Note: Sub-assemblies do not print on the invoice itself by default although this can be changed if desired.
 Related Topics